Discovering how to draw on Procreate can transform your digital art journey, opening up a world of creative possibilities. This blog post is designed to guide you through the essential steps and techniques, from setting up your canvas to applying the finishing touches, ensuring your Procreate experience is both rewarding and enjoyable.
Table of Contents
How to draw on Procreate : Setting Up, Starting Your First Canvas
Beginning your artistic journey in Procreate starts with setting up your first canvas, a pivotal step in learning how to draw on Procreate effectively. Upon launching Procreate, tap the “+” icon to create a new canvas, where you can select from preset sizes or customize your dimensions based on your project’s requirements. This flexibility allows you to tailor your workspace to fit anything from detailed illustrations to expansive landscapes. It’s also essential to consider the resolution, especially if you plan to print your artwork, ensuring that your creations maintain their quality in physical form. Familiarizing yourself with this initial setup process is key to a smooth and successful drawing experience in Procreate.
Navigating the Procreate Interface: A Beginner’s Guide
Navigating the Procreate interface is crucial for anyone learning how to draw on Procreate. The software boasts an intuitive design, making it accessible for artists of all skill levels. The main canvas is your playground, with essential tools like brushes, colors, layers, and the undo button elegantly arranged for easy access. To the left, you’ll find the brush size and opacity sliders, and the top-right corner houses your layers and actions menu. Getting comfortable with these tools and menus is your first step toward creating stunning digital art. Taking some time to explore and experiment with Procreate’s interface will pay dividends in your artistic process, allowing you to focus more on creativity and less on navigating the software.
Brush Basics: Choosing the Right Tools for Your Art
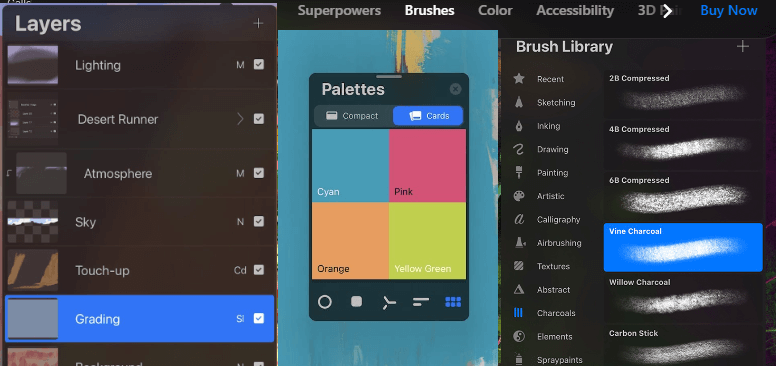
Choosing the right tools for your art is a fundamental aspect of learning how to draw on Procreate, with brushes being at the heart of the digital painting experience. Procreate offers an extensive library of brushes across various categories, from inking and painting to textures and effects, each designed to emulate the characteristics of real-world materials. For beginners, navigating this selection can seem daunting. Start by experimenting with different brush types to understand their behavior and effect on your canvas. Pay attention to how changes in pressure and angle affect the stroke. Adjusting brush settings, such as size, opacity, and flow, can further customize your drawing experience, allowing for greater control and precision in your artwork. As you become more familiar with these tools, you might find yourself gravitating towards certain brushes that complement your unique style.
Mastering Color Selection: Bringing Vibrancy to Your Drawings
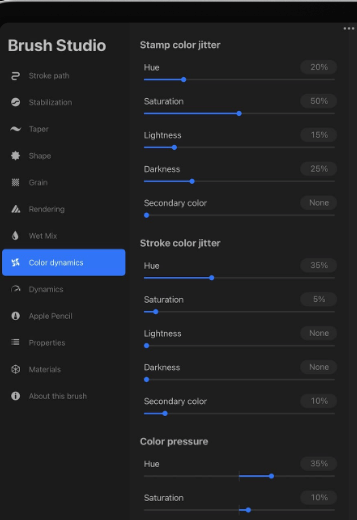
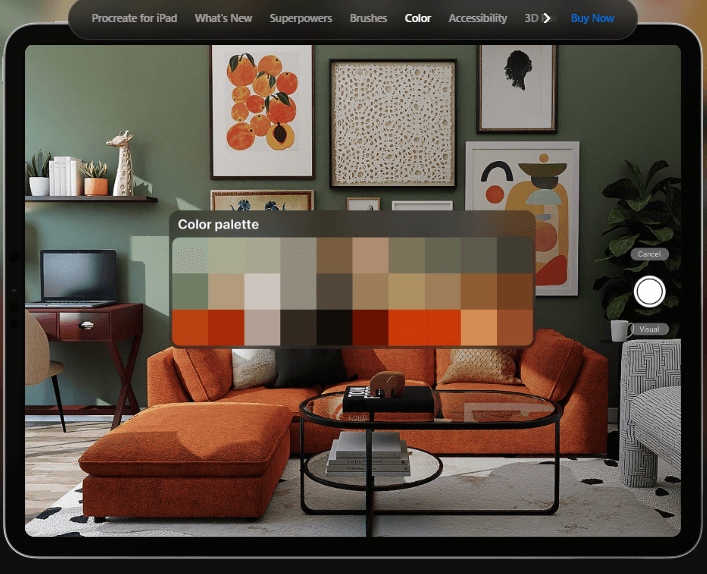
Mastering color selection is a pivotal step in bringing vibrancy and life to your drawings, especially when learning how to draw on Procreate. The app offers a sophisticated color picker tool that enables artists to choose from an infinite spectrum of colors with precision. Whether you’re aiming for subtle shades or bold hues, understanding the color wheel, harmony, and value sliders within Procreate can transform your artwork. Experiment with the palette feature to save your favorite colors and create custom palettes tailored to specific projects. This not only speeds up your workflow but ensures consistency across your work. Additionally, utilizing the eyedropper tool allows for quick color matching directly from your canvas, facilitating a cohesive color scheme throughout your piece.
The Art of Sketching: Laying the Foundation
The art of sketching in Procreate is the foundational step in any digital drawing process, crucial for artists learning how to draw on Procreate. Sketching allows you to lay down your initial ideas and compositions, acting as a blueprint for your final piece. Utilizing Procreate’s diverse range of pencil, ink, and custom brushes, you can experiment with different line weights, textures, and styles to find what best suits your project. Remember, sketching is about exploration and refinement; it’s okay for your initial sketches to be loose and imperfect. Use layers to your advantage, creating new ones for different sketch phases or for experimenting with changes without altering the original sketch. This iterative process helps in developing a more detailed and polished final artwork.
Layering Like a Pro: Organizing Your Artwork
Layering like a pro in Procreate is essential for organizing your artwork efficiently and is a fundamental skill for anyone learning how to draw on Procreate. The app’s layering system allows you to separate different elements of your piece, such as the sketch, base colors, shading, and highlights, providing a non-destructive way to edit your work. By mastering layers, you can experiment with various effects and adjustments without the fear of permanently altering your underlying artwork. Utilize grouping to keep related layers organized and blending modes to create complex color and texture interactions between layers. Learning to effectively manage layers not only streamlines your workflow but also unlocks new creative possibilities, allowing for more intricate and detailed compositions. Familiarity with Procreate’s layer limits based on your device’s capabilities is also crucial to avoid any workflow disruptions.
Detailing and Texturing: Enhancing Your Drawings
Detailing and texturing are pivotal in enhancing your drawings on Procreate, transforming simple sketches into intricate, lifelike artworks. Mastering how to draw on Procreate involves utilizing its advanced brush library and blending modes to add depth and texture to your creations. Start by layering fine details with Procreate’s precision brushes, focusing on areas that require emphasis, such as shadows and highlights, to give your work a three-dimensional appearance. Experiment with texture brushes to introduce various surface effects, from the roughness of a stone to the softness of fur, enriching the visual experience. Procreate’s smudge tool also plays a crucial role in blending colors and textures seamlessly, ensuring a cohesive and realistic finish. Taking advantage of these features not only elevates the quality of your art but also brings a new level of realism and detail to your digital canvas.
Finishing Touches: Exporting and Sharing Your Art
Adding the finishing touches, exporting, and sharing your art are crucial final steps in the creative process when learning how to draw on Procreate. Once your artwork is complete, Procreate offers various options to export and share your creation in multiple formats such as JPEG, PNG, PDF, and even PSD for compatibility with other editing software. Navigate to the ‘Actions’ menu, represented by a wrench icon, and select ‘Share’ to choose your desired format. For digital viewing, JPEG or PNG formats are typically sufficient, but for printing or further editing in another software, consider exporting in PDF or PSD formats. Additionally, Procreate allows you to share your artwork directly to social media platforms or via email, making it easy to showcase your creations to the world. Ensuring your artwork is presented in the best quality and format can enhance its impact, whether it’s for your portfolio, social media, or print.
Continuing Your Procreate Journey: Next Steps and Resources
Continuing your Procreate journey involves more than just mastering the basics of how to draw on this versatile platform; it’s about constantly evolving your skills, experimenting with new techniques, and staying updated with the latest features. To further enhance your Procreate skills, explore the wealth of online tutorials and Procreate-focused communities. Websites like Skillshare, YouTube, and Procreate’s own forum offer in-depth lessons on everything from fundamental drawing techniques to advanced digital painting strategies. Additionally, regularly updating Procreate ensures you have access to the latest tools and improvements. Joining social media groups or forums dedicated to Procreate artists can also provide valuable feedback, inspiration, and support as you grow. Remember, the journey of creativity is ongoing, and each piece is a step towards refining your artistic voice.


